Tableau
Tableau is a widely-used business intelligence and data visualization platform that enables data analysts to build interactive dashboards and reports. MotherDuck supports both Tableau Cloud (via the Tableau Cloud Bridge) and Tableau Server.
- Tableau Cloud
- Tableau Desktop & Server
How to use Tableau Cloud with MotherDuck via Tableau Bridge
Setup
This guide assumes you have:
- a Tableau account
- a Tableau Cloud Site
- a Tableau Desktop installation (with the same version as the Tableau Cloud Server Version) set up with the DuckDB JDBC Driver and Tableau Connector.
If you don't, sign up or ask your organization to purchase a plan, or sign up for a free trial.
Obtain a PAT token
Follow Tableau's instructions on creating a PAT token. This token must belong to a site admin.
Setup Bridge client
Use instructions here to install and setup Bridge client.
-
Make sure the machine where the Bridge client is installed has access to the Database used in the above steps.
Important notes:
Network access - Because Bridge facilitates connections between your private network data and Tableau Cloud, it requires the ability to make outbound connections through the internet. After the initial outbound connection, communication is bidirectional.
Required ports - Tableau Bridge uses port 443 to make outbound internet requests to Tableau Cloud and port 80 for certificate validation.
-
Install Bridge client and make sure the Bridge client is logged in to the Tableau Cloud site. You can download the installer here.
-
Install the driver and taco files as outlined here.
- [Windows Server] The driver also needs to be installed here:
C:\Program Files\Tableau\Tableau Bridge\Drivers - [Windows Server] The connector also needs to be installed here:
C:\Program Files\Tableau\Connectors
- [Windows Server] The driver also needs to be installed here:
Note: Tableau Bridge can be deployed on both Windows or Linux.
Running Bridge on Linux using Docker (advanced)
If you want to run Bridge centrally on a Linux host, the official guidance recommends running it inside a Docker container, as described in Tableau’s documentation on installing Bridge for Linux in containers.
Below is an example Dockerfile you can use as a starting point—this includes where to add JDBC drivers and the DuckDB/MotherDuck .taco file. It’s provided for inspiration and may require updates to match your environment or newer versions of the software.Example Dockerfile
FROM registry.access.redhat.com/ubi8/ubi:latest

RUN yum update -y
RUN yum install -y glibc-langpack-en
# This is the latest version of Tableau Bridge that is known working with the MotherDuck connector
RUN curl -o /tmp/TableauBridge.rpm -L \
    https://downloads.tableau.com/tssoftware/TableauBridge-20243.25.0114.1153.x86_64.rpm && \
    ACCEPT_EULA=y yum install -y /tmp/TableauBridge.rpm && \
    rm /tmp/TableauBridge.rpm

# Drivers
RUN mkdir -p /opt/tableau/tableau_driver/jdbc

# Connectors (tacos)
RUN mkdir -p /root/Documents/My_Tableau_Bridge_Repository/Connectors

# Download DuckDB JDBC driver and signed taco
RUN curl -o /opt/tableau/tableau_driver/jdbc/duckdb_jdbc-1.3.0.0.jar \
         -L https://repo1.maven.org/maven2/org/duckdb/duckdb_jdbc/1.3.0.0/duckdb_jdbc-1.3.0.0.jar && \
     curl -o /root/Documents/My_Tableau_Bridge_Repository/Connectors/duckdb_jdbc-v1.1.1-signed.taco \
          -L https://github.com/motherduckdb/duckdb-tableau-connector/releases/download/v1.1.1/duckdb_jdbc-v1.1.1-signed.taco

ENV TZ=Europe/Berlin
ENV LC_ALL=en_US.UTF-8

# -----  user specific settings -----
ENV USER_EMAIL=""
ENV PAT_ID=BridgeToken
ENV CLIENT_NAME=""
ENV SITE_NAME=""
ENV POOL_ID=""
# -----------------------------------

CMD /opt/tableau/tableau_bridge/bin/run-bridge.sh -e \
  --patTokenId=$PAT_ID \
  --userEmail=$USER_EMAIL \
  --client=$CLIENT_NAME \
  --site=$SITE_NAME \
  --patTokenFile="/home/documents/token.txt" \
  --poolId=$POOL_ID
Key points:
- Build an image that installs the Bridge RPM and then copies the DuckDB JDBC driver to
/opt/tableau/tableau_bridge/Driversand the connector to/root/Documents/My_Tableau_Bridge_Repository/Connectors. - Start the bridge by calling
run-bridge.shand pass the following flags:--patTokenFile /run/secrets/pat.json--patTokenId <PAT_NAME>--site <YOUR_SITE_NAME>--poolId <POOL_ID>(optional – see note on pools below)
- PAT naming rule – the name you give the Personal-Access-Token in Tableau must be a valid JSON key and must be used verbatim
- as the key in
pat.json→{"<PAT_NAME>": "<PAT_VALUE>"} - in the
--patTokenIdflag. A mismatch will result in a silent authentication failure.
- as the key in
- The latest Bridge 2025.1 builds contain a regression that prevents the MotherDuck connector (and several others) from loading. Until Tableau fixes this, pin the image to the 20243.25.0114.1153 release (see discussion here).
- Bridge listens only on outbound 443/tcp, so you do not need to publish any container ports. If you run a host firewall (e.g.
ufw) remember that Docker bypasses it [Docker docs]. Restrict egress traffic to Tableau Cloud CIDR blocks if your security policy requires it. - Logs written to
stdoutare useful, but the detailed logs live in/root/Documents/My_Tableau_Bridge_Repository/Log. Mount this path as a volume or use a side-car to ship the logs to your observability stack.
Tableau Cloud Bridge Pool setup
By default, Tableau places the Bridge in the default pool.
- In Settings → Bridge page, make sure the Bridge client is connected in the connection Status.
- In the "Private Network Allowlist" add the domain of the database and select the pool.
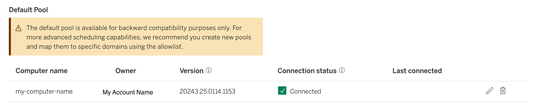
Pool Goctha: Some users report that a Linux containerised Bridge never shows up under a custom site pool. If that happens simply leave
POOL_IDblank when starting the client – it will join the legacy Default pool and still work with live connections.
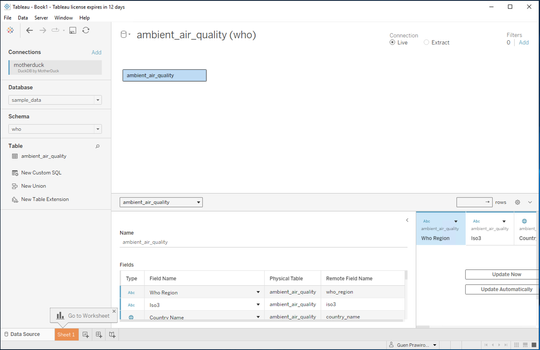
Create Embedded Data Source (Live) and Workbook
- Open Tableau desktop and login to a Tableau Cloud site.
Note: Make sure the Tableau Desktop and Tableau Cloud version match.
-
Create new Workbook and select the database connector.
-
Connect to the database.
-
Setup Datasource to use live connectivity.
-
Create a worksheet with the data.
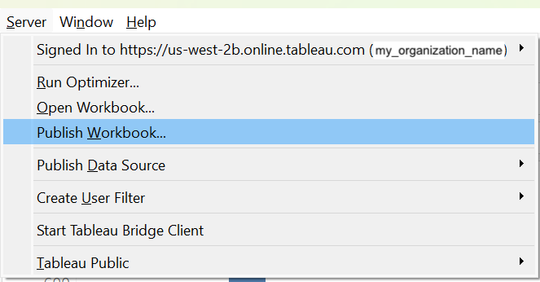
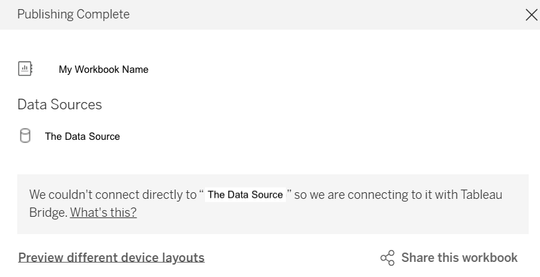
Publish the Workbook to Tableau Cloud
- Click on "Server > Publish Workbook".
- Select "Publish Separately" under Publish Type and "Embedded password" under Authentication. Select "Maintain connection to a live data source".
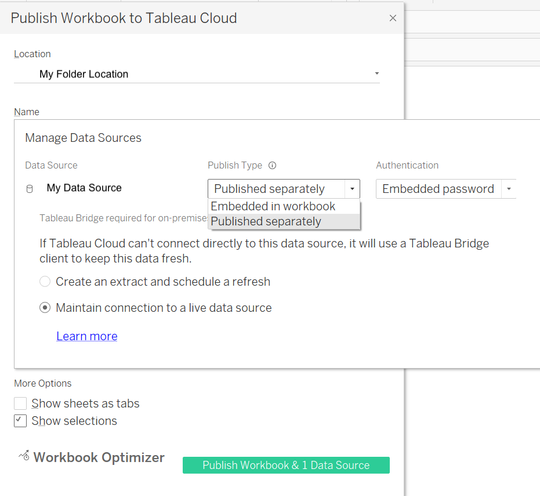
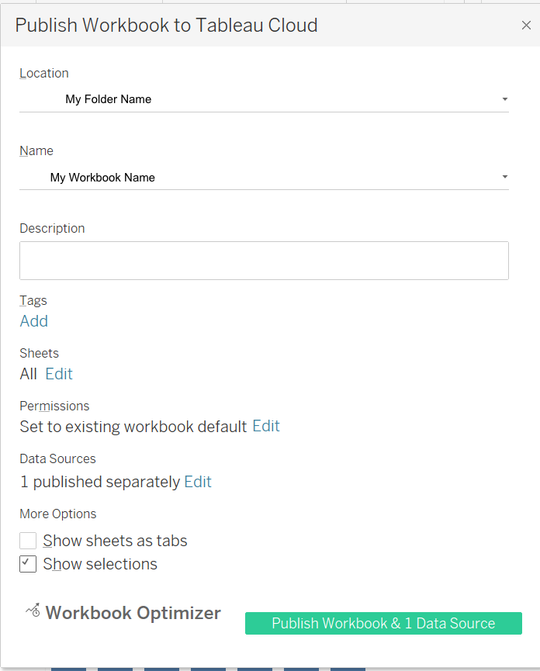
- Click "Publish Workbook & 1 Data Source".
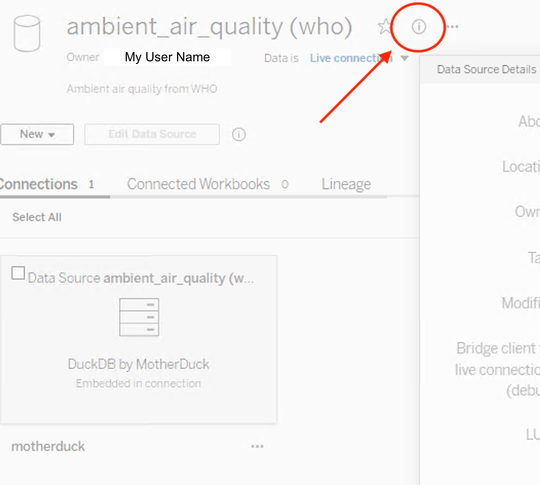
(Important step!) Update Tableau Bridge client in data source
- Navigate to the newly published data source in Tableau Cloud (in your browser) and click on the "i" icon to open Data Source Details.
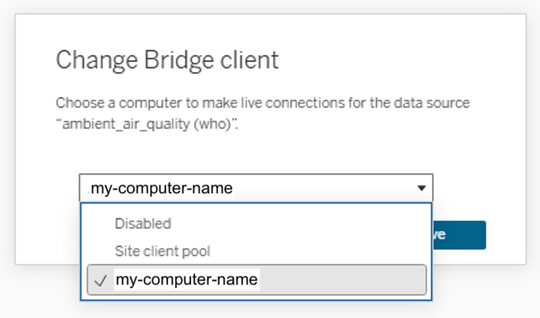
- Click on "Change Bridge Client..."
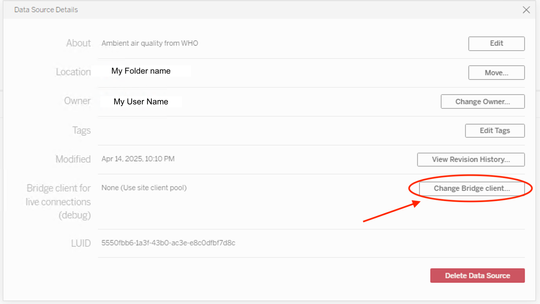
- Change the bridge client from "Site client pool" to your bridge client (the one you set up in the previous section). Click "Save" and close the dialog.
-
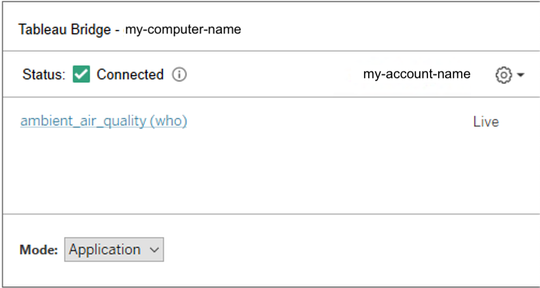
Check that the data source now shows up in your Tableau Bridge status dialog. This dialog is located in the Windows Start bar (in the Icon panel).
-
You can now access your Published Workbook on your Tableau Cloud Site, or you can create a new Tableau Workbook using the Published Data Source.
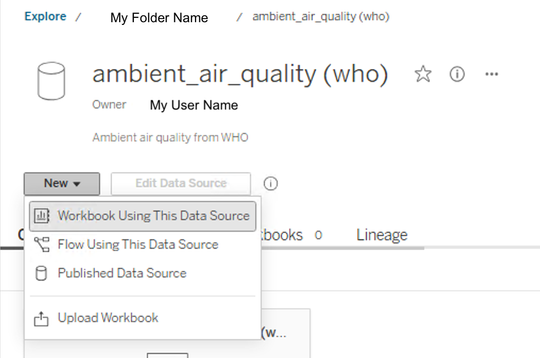
Tableau Desktop DuckDB/MotherDuck Setup
-
Download a recent version of the DuckDB JDBC driver and copy it into the Tableau Drivers directory:
- MacOS:
~/Library/Tableau/Drivers/ - Windows:
C:\Program Files\Tableau\Drivers - Linux:
/opt/tableau/tableau_driver/jdbc
- MacOS:
-
Download the signed tableau connector (aka "Taco file") file from the latest available release and copy it into the Connectors directory:
- Desktop Windows:
C:\Users\[YourUser]\Documents\My Tableau Repository\Connectors - Desktop MacOS:
/Users/[YourUser]/Documents/My Tableau Repository/Connectors - Server Windows:
C:\ProgramData\Tableau\Tableau Server\data\tabsvc\vizqlserver\Connectors - Server Linux:
[Your Tableau Server Install Directory]/data/tabsvc/vizqlserver/Connectors
- Desktop Windows:
Connecting
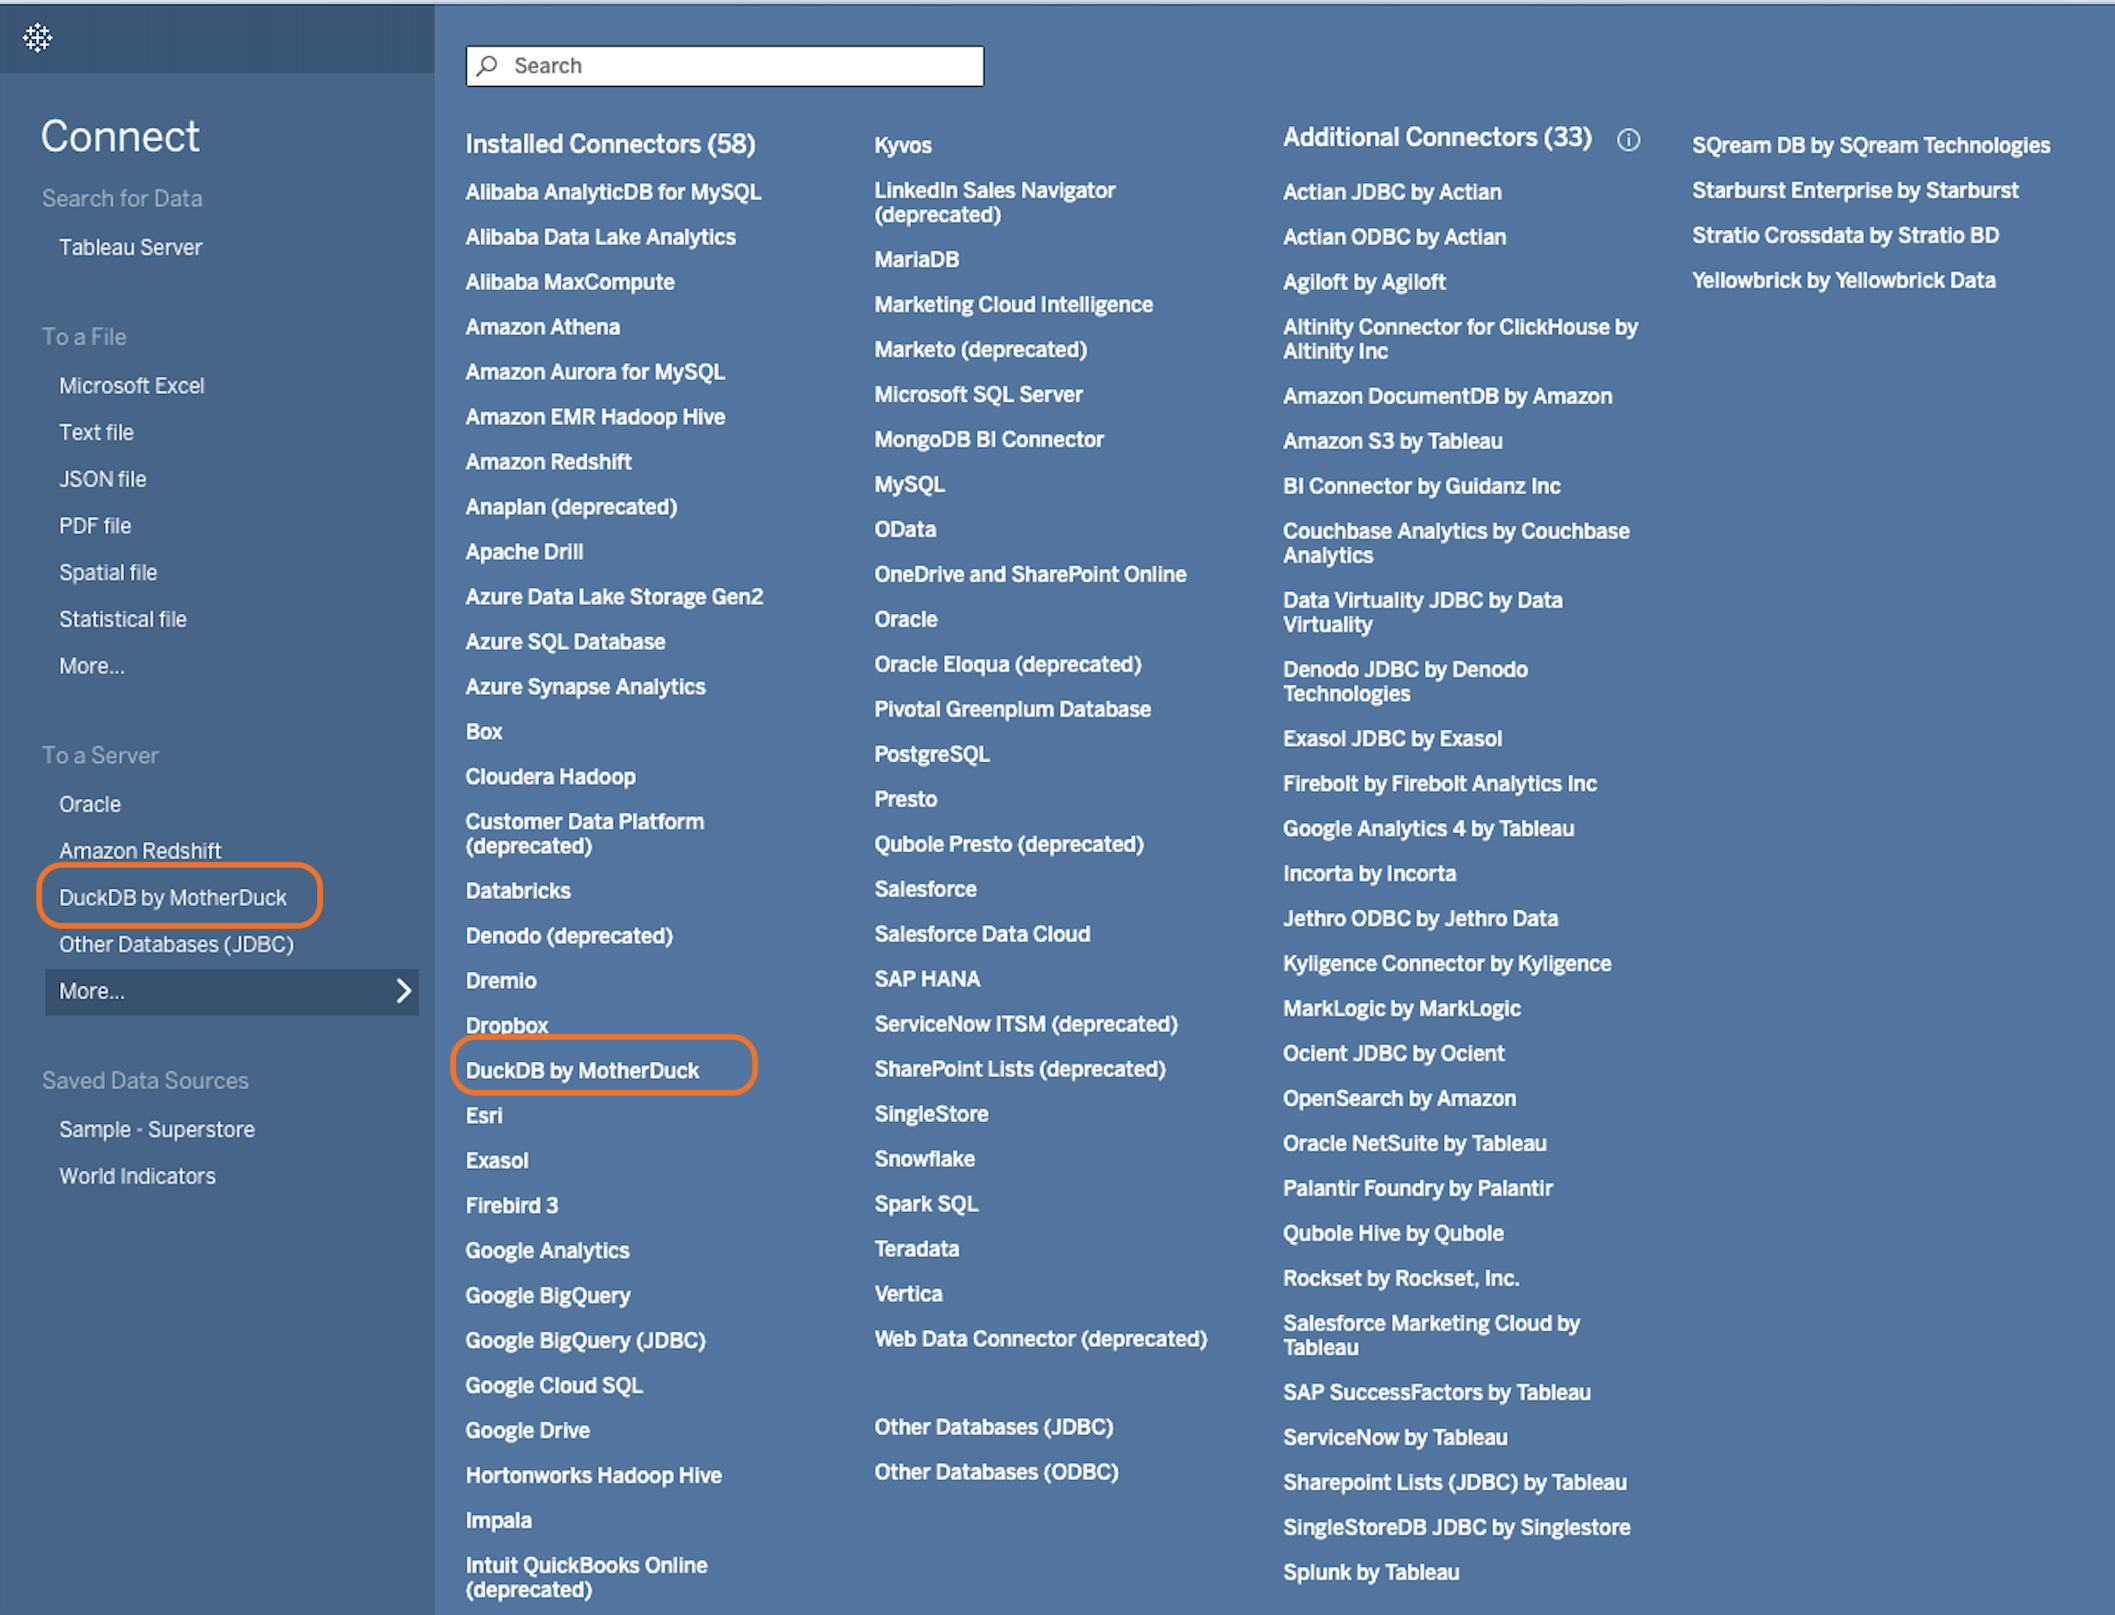
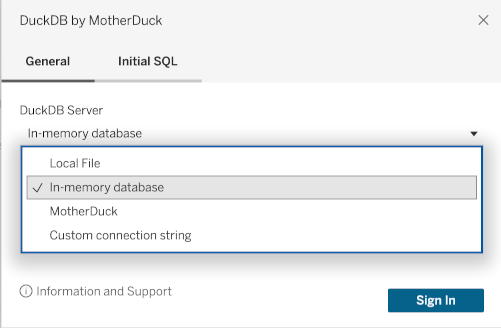
Once the Taco is installed, and you have launched Tableau, you can create a new connection by choosing "DuckDB by MotherDuck":
Local DuckDB database
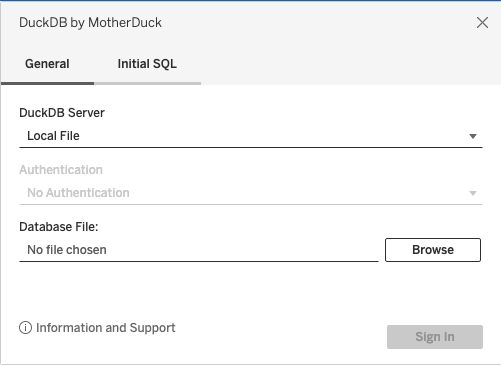
If you wish to connect to a local DuckDB database, select "Local file" as DuckDB Server option, and use the file picker:
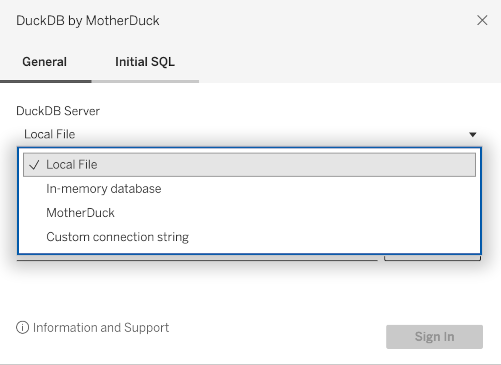
In-Memory Database
The driver can be used with an in-memory database by selecting the In-memory database DuckDB Server option.
The data will then need to be provided by an Initial SQL string e.g.,
CREATE VIEW my_parquet AS
    SELECT *
    FROM read_parquet('/path/to/file/my_file.parquet');
You can then access it by using the Tableau Data Source editing controls.
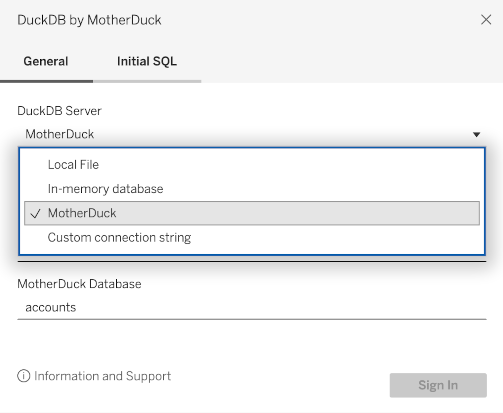
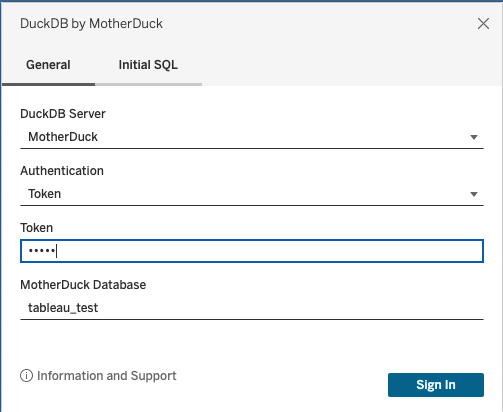
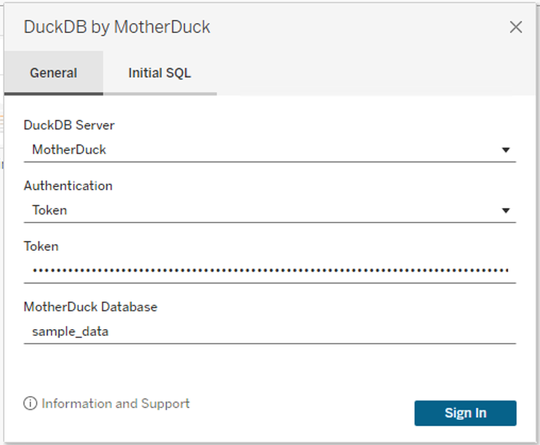
MotherDuck
To connect to MotherDuck, you have two authentication options:
- Token -- provide the value that you get from MotherDuck UI.
- No Authentication -- unless
motherduck_tokenenvironment variable is available to Tableau at startup, you will then be prompted to authenticate when at connection time.
To work with a MotherDuck database in Tableau, you have to provide the database to use when issuing queries.
In MotherDuck Database field, provide the name of your database. You don't have to prefix it with md::